_edited.png)

Master Peptide Reconstitution Workflow for Lab Accuracy
- Colt Clemons

- Feb 20
- 8 min read
Working in a cluttered lab can quickly turn routine peptide reconstitution into a costly setback. Biomedical researchers and lab managers across American universities know that precise preparation and a sterile workspace guard against contamination and wasted materials. This guide covers how to gather the right supplies, select the best solvent, and apply gentle mixing techniques—all built around the key principle of maintaining peptide integrity from start to finish.
Table of Contents
Quick Summary
Key Point | Explanation |
1. Prepare a sterile workspace | Gather all necessary supplies in a clean area to prevent contamination and ensure successful reconstitution. |
2. Choose the right solvent | Select an appropriate solvent based on the peptide’s properties to maximize solubility and stability. |
3. Use gentle mixing techniques | Carefully swirl and roll the vial instead of shaking to preserve peptide structure and prevent damage. |
4. Document reconstitution details | Keep accurate records of your process to facilitate reproducibility and troubleshoot any future issues. |
5. Verify purity visually | Inspect the final peptide solution for clarity to ensure successful dissolution and avoid contamination. |
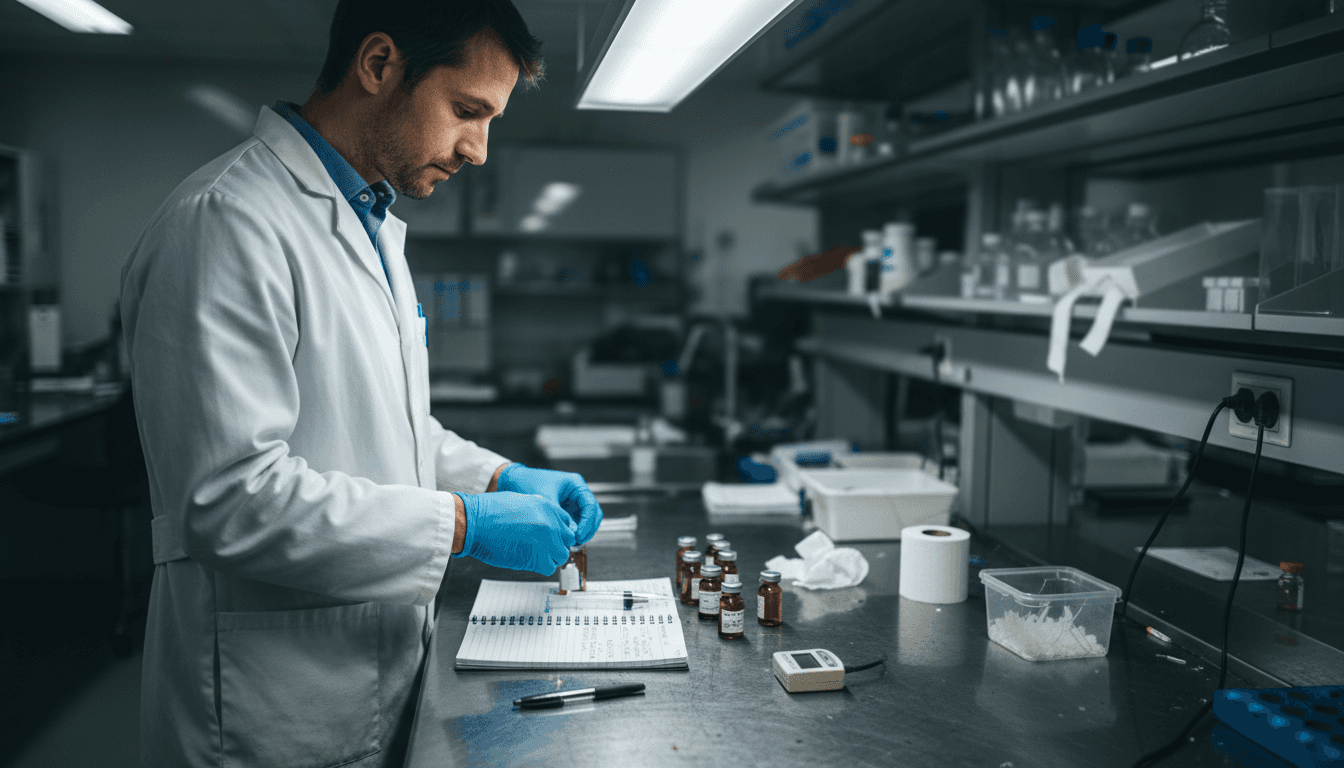
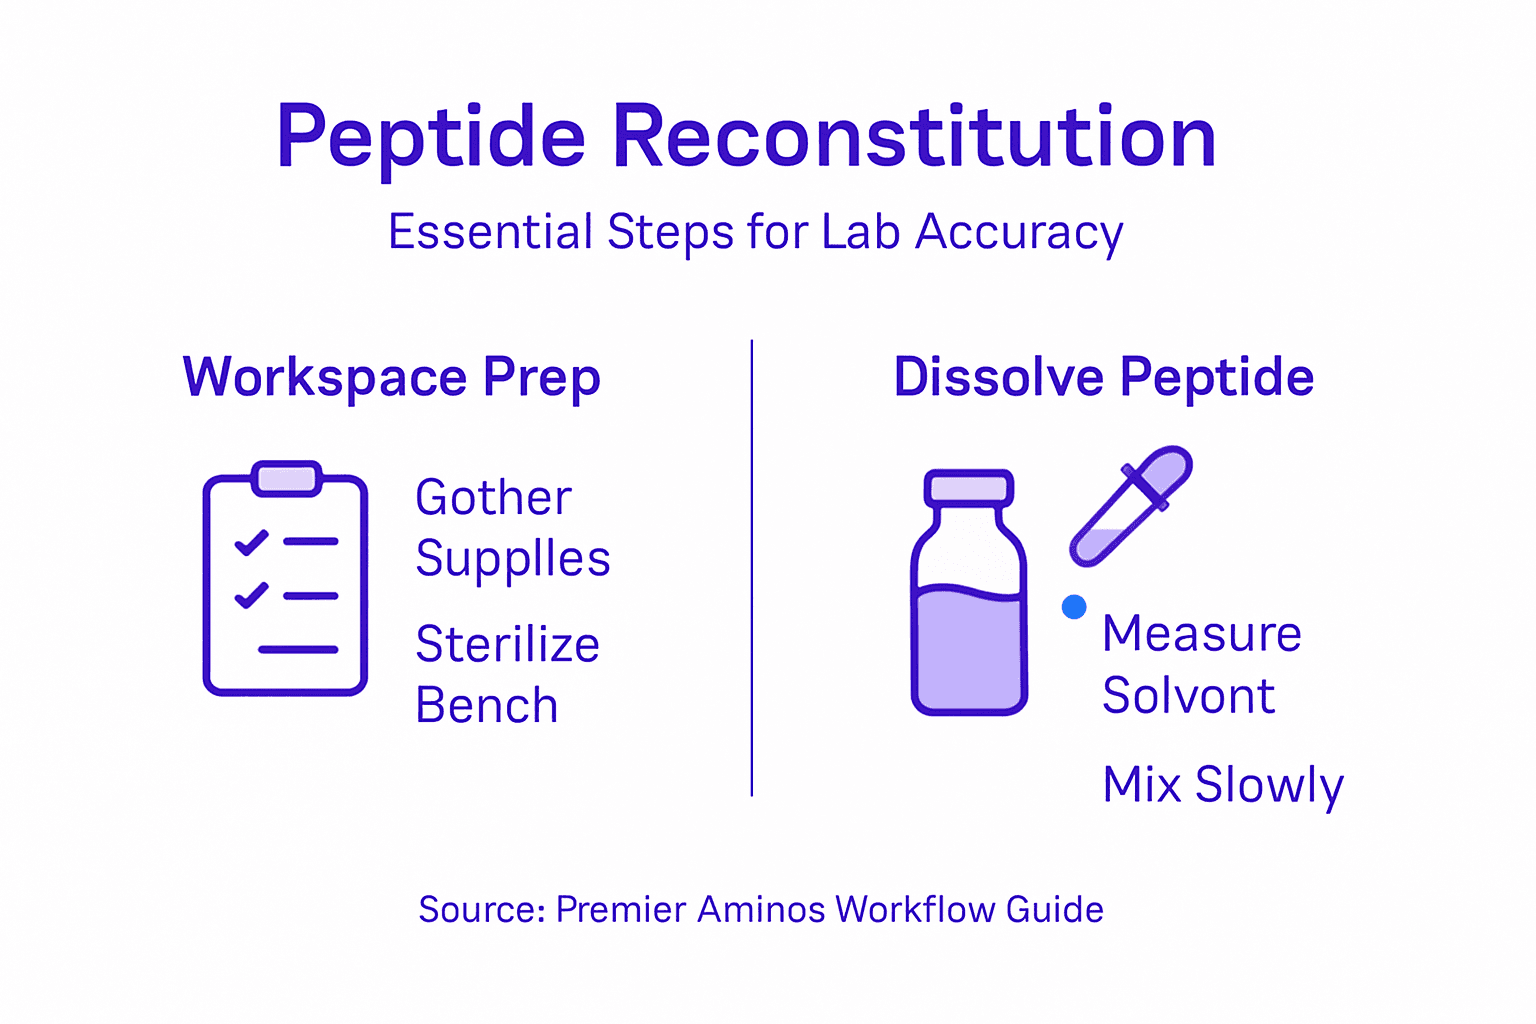
Step 1: Prepare materials and establish sterile workspace
Before you touch a single vial, gather everything you’ll need. Working in a disorganized space leads to mistakes, contamination, and wasted peptide material that costs your lab time and resources.
Start by assembling your supplies in one clean, well-lit area. You’ll need sterile diluent, sterile syringes and needles, alcohol wipes, your peptide vials, and labeling materials. Having everything within arm’s reach prevents you from leaving your workspace mid-reconstitution.
Clear your work surface completely. Remove clutter, papers, and anything that doesn’t belong. Wipe down the entire workspace with alcohol wipes using deliberate, circular motions. This eliminates dust, microbes, and residue that could contaminate your peptides.
Your sterile diluent choice matters significantly. According to the step-by-step reconstitution guide, using sterile diluent is non-negotiable for maintaining peptide integrity. Bacteriostatic water or sterile saline are common choices for research applications.
Set up your workspace with these essentials:
Sterile syringes and needles (unopened until needed)
Alcohol wipes (70% isopropyl alcohol minimum)
Sterile diluent in sealed containers
Peptide vials (kept cool until use)
Clean, lint-free labels and pen
Proper lighting to see what you’re doing
Working in a contamination-free environment from the start prevents failed batches and preserves the ≥99% purity of your research-grade peptides.
Check that all your tools are genuinely sterile. If you’re reusing syringes or containers, sterilization must happen before you begin. Never assume equipment is clean just because it looks clean.
Maintain your clean workspace throughout the entire process. Don’t answer emails, don’t chat with colleagues at your bench, and don’t set down items that haven’t been sterilized. One careless moment introduces contamination that ruins your work.
Pro tip: Lay out all materials in the order you’ll use them, moving from left to right across your workspace—this creates a natural workflow and reduces the chance of forgetting a crucial step.
Step 2: Select solvent and accurately measure peptide
Your solvent choice directly impacts how well your peptide dissolves and remains stable. The wrong solvent wastes material and compromises your results before reconstitution even begins.
Bacteriostatic water is the gold standard for most research applications. It contains a small amount of benzyl alcohol that prevents bacterial growth, extending the shelf life of your reconstituted peptides. This antimicrobial property makes it ideal for maintaining biomolecule stability over time.
However, not all peptides play nicely with water. Consider your peptide’s chemical properties when selecting a solvent:
Here’s a quick comparison of common peptide reconstitution solvents and their best-use cases:
Solvent Type | Key Features | Ideal For | Limitations |
Bacteriostatic Water | Contains benzyl alcohol; antimicrobial | Hydrophilic peptides, routine research | Not suitable for some acidic or lipophilic peptides |
Sterile Saline | Isotonic, no antimicrobial | Short-term use, easy dissolution | Limited shelf life, not ideal for long-term storage |
Organic Solvents | Specialized for lipophilic compounds | Lipophilic peptides, challenging solubility | May affect peptide structure, requires extra care |
Basic Buffers | pH-adjusted for solubility | Acidic peptides struggling to dissolve | Not universally compatible, confirm peptide stability |
Hydrophilic peptides dissolve easily in sterile or bacteriostatic water
Acidic peptides may require basic buffers to achieve proper solubility
Lipophilic peptides sometimes need organic solvents or specialized buffers
Always consult your peptide’s documentation before choosing
Accurate measurement of your solvent volume determines dosing consistency—this precision is what separates reproducible research from failed experiments.
Now comes the math part. Accurate peptide measurement requires calculating solvent volume based on your peptide’s mass and your desired final concentration. Let’s say you have 10 milligrams of peptide and want a concentration of 1 milligram per milliliter. You’ll add 10 milliliters of solvent.
Use a sterile syringe to measure your solvent with precision. Never estimate or pour by eye. Small measurement errors compound throughout your experiments, introducing variables that make results impossible to replicate.
Record your calculation before you begin. Write down the peptide mass, target concentration, calculated solvent volume, and the solvent type you’re using. This documentation matters for your lab records and helps you troubleshoot if something goes wrong later.
Double-check your math. Seriously. Grab a colleague to verify your calculation if you’re uncertain. One extra minute prevents hours of wasted work.
Pro tip: Use graduated syringes marked in 0.1 milliliter increments rather than unmarked ones—this eliminates guesswork and ensures you hit your target volume every single time.
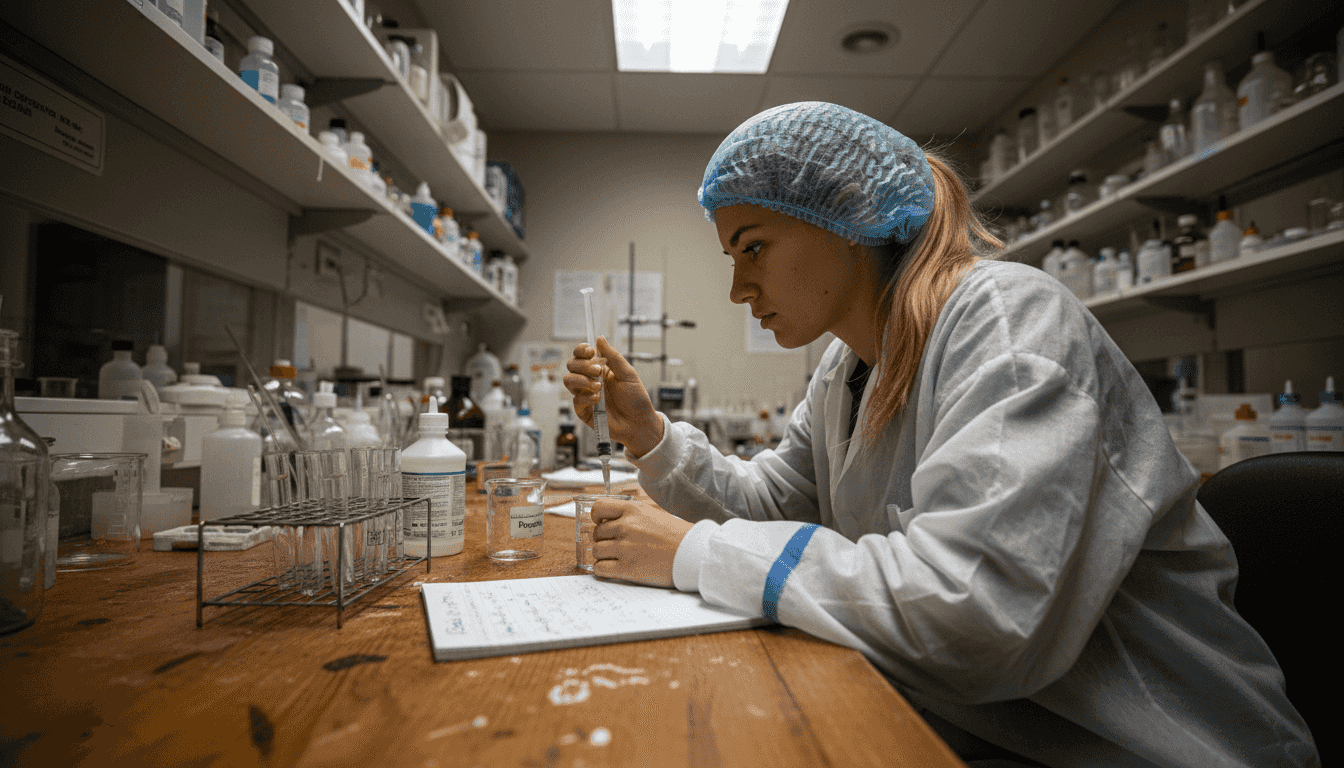
Step 3: Reconstitute peptide using precise mixing technique
This is where patience matters most. Vigorous shaking or careless mixing destroys the peptide structure you’re trying to preserve. Your technique during these next few minutes determines whether your reconstitution succeeds or fails.
Begin by drawing your calculated solvent volume into a sterile syringe. Insert the needle into the peptide vial at a slight angle. Position the needle tip against the vial wall rather than pointing directly at the lyophilized powder.
Add the solvent slowly along the vial wall. This slow addition technique prevents foaming and bubble formation that can damage peptide chains. Rush this step and you risk aggregation that compromises your entire batch.
Once all solvent is added, remove the syringe and needle. Now comes the gentle mixing phase:
Never shake the vial vigorously
Gently swirl the vial in slow circles
Roll the vial slowly between your palms
Allow time for the peptide to dissolve naturally
Continue for two to three minutes minimum
Gentle mixing prevents aggregation and degradation that vigorous shaking causes, preserving the integrity of your research-grade peptides.
Watch for visible changes. The solution should gradually transition from a cloudy appearance to complete clarity. You’re looking for a transparent liquid with no visible particles or precipitate floating inside.
Check the vial from different angles under good lighting. Sometimes cloudiness hides near the walls or bottom. If you see particles after five minutes of gentle mixing, the peptide may not be fully dissolved or your solvent choice might be incorrect.
Once clarity is achieved, your reconstitution is complete. The peptide is now in solution and ready for storage. Resist the urge to shake harder if dissolution seems slow. Patience at this stage prevents damage that no amount of extra effort can fix.
Pro tip: Set a timer for gentle mixing rather than eyeballing it—three to five minutes of consistent, slow rolling ensures complete dissolution without the temptation to rush or shake harder.
Step 4: Verify purity and document reconstitution results
Your reconstitution is complete, but verification and documentation are what transform this work into reproducible science. Without proper records, you cannot replicate results or troubleshoot problems later.
Start by visually inspecting your reconstituted peptide solution. The liquid should be clear and colorless unless your specific peptide has known coloration. Look for any cloudiness, particles, or discoloration that suggests incomplete dissolution or contamination.
If your peptide came with a Certificate of Analysis (COA), review it carefully. This document confirms the purity level of your starting material, typically showing ≥99% purity for research-grade peptides. Compare the batch number on your vial with the batch number on the COA to ensure you have the correct product.
Now begin your documentation. Record these critical details:
Peptide name and batch number
Starting peptide mass in milligrams
Solvent type and volume added
Date and time of reconstitution
Your name or initials
Appearance of final solution
Any observations about dissolution speed
Complete documentation creates an audit trail that proves your work meets research standards and enables troubleshooting if unexpected results occur later.
Consider visual purity assessment as your first checkpoint. Verifying peptide purity involves examining your solution under controlled lighting for clarity and consistency. While visual inspection cannot determine exact purity percentages, it confirms successful reconstitution.
If your lab has access to analytical equipment, you may perform additional verification. High-performance liquid chromatography (HPLC) provides precise purity data. Mass spectrometry confirms molecular weight and identity. These tests are optional for many applications but valuable when regulatory compliance matters.
Store your documentation alongside your reconstituted peptide. Include the COA, your handwritten notes, and any test results. This complete file becomes your research record.
Label your storage vial clearly with reconstitution date and time. Include your initials and the final concentration. This prevents confusion if multiple batches exist in your freezer.
Below is a summary of essential information to record after peptide reconstitution:
Documentation Item | Purpose | Example Entry |
Peptide Name/Batch | Traceability and quality control | ABC123, Batch 5678 |
Solvent Type/Volume | Ensures dosing accuracy | Bacteriostatic water, 10 mL |
Appearance/Observations | Confirms purity and dissolution status | Clear, no particles |
Reconstitution Date/Initials | Establishes audit trail | 06/10/2024, J.D. |
Pro tip: Create a simple spreadsheet template for your lab with column headers for all key data—this standardizes documentation across team members and makes future reference quick and reliable.
Elevate Your Lab Precision with Premium Research-Grade Peptides
Mastering peptide reconstitution means overcoming challenges like contamination risk, accurate solvent measurement, and delicate handling needed to preserve peptide integrity. Your goal is to maintain ≥99% purity and precise dosing every time. This demands not only expert technique but also reliable peptide sources that meet strict research standards and come complete with Certificates of Analysis for full transparency.
Achieve consistent success with peptides from Peptides | Premier Aminos where quality control meets scientific rigor.
Start every reconstitution with confidence by choosing from our extensive selection of lab-tested peptides backed by independent verification. Enjoy fast U.S. shipping and bulk purchase options that keep your research on schedule without compromise. Visit Premier Aminos now to explore our peptide catalog and empower your lab with the trusted materials you deserve.
Frequently Asked Questions
What materials do I need for peptide reconstitution?
You will need sterile diluent, sterile syringes and needles, alcohol wipes, peptide vials, and labeling materials. Gather these in a clean and well-lit area to create an organized workspace.
How do I select the right solvent for my peptide?
Bacteriostatic water is ideal for most peptides, as it prevents bacterial growth and maintains stability. Always consider your peptide’s chemical properties and refer to its documentation to determine if alternative solvents, like sterile saline or organic solvents, are necessary.
What is the proper technique for mixing the solvent with the peptide?
Add the solvent slowly along the vial wall instead of directly onto the peptide powder to prevent foaming. Use gentle swirling or rolling methods to mix, avoiding vigorous shaking, to ensure the integrity of the peptide.
How can I verify that my reconstitution is successful?
Visually inspect the solution for clarity and absence of particles or cloudiness. Additionally, consult the Certificate of Analysis for purity verification and record your findings to establish a reliable audit trail.
What details should I document after reconstituting my peptide?
Document the peptide name, batch number, solvent type and volume, reconstitution date and time, and observations about the solution’s appearance. Maintaining thorough records supports reproducibility and future troubleshooting in your research.
How do I maintain a sterile workspace during peptide reconstitution?
Clear your work surface of clutter, wipe it down with alcohol wipes, and keep all materials within arm’s reach. Avoid distractions like phone calls or conversations, and only use sterilized equipment to minimize contamination risks.
Recommended


Comments